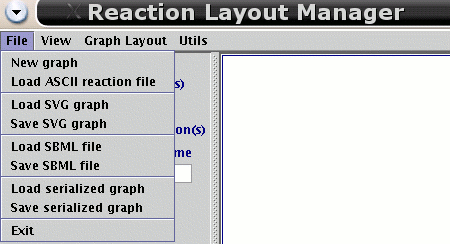
| File menu item | Description |
| New Graph | Creates an empty graph panel. |
| Load ASCII reaction file | Choosing this menuentry brings up a file manager, so that the user can choose ascii file. (ascii file format) |
| Load SVG graph | Choosing this menuentry brings up a file manager, so that the user can choose a svg graph file. |
| Save SVG graph | Choosing this menuentry brings up a file manager, so that the user can save the current graph in the svg format. |
| Load SBML file | Clicking here brings up a file manager, with which the user can select a SBML file to load. |
| Save SBML file | Choosing this menuentry brings up a file manager, so that the user can save the current graph in the SBML format with layout information, but that does not work for new created graphs. |
| Load serialized graph | Choosing this menuentry brings up a file manager, so that the user can choose a file to load (Java serialization protocol see). |
| Save serialized graph | Clicking here brings up a file manager, with which the user can save the current graph. |
| Exit | Exit ReactionLayouter. |
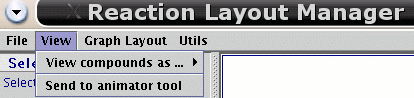
| Settings menu item | Description |
| View compounds as ... | Here you can select the representation style of compunds.
|
| Send to animator tool | Send this graph to the animator tool SimWiz. |

| Settings menu item | Description |
| Join all nodes with identical names | Joins all occurences of a node with the same name to one single node. |
| Set layout algorithm options | Set options to adopt the layout algorithm to the user needs. |
| Apply layout algorithm | Starts the layout process. |
| Change list of side compounds | Add or delete side compounds from a predefined list. |
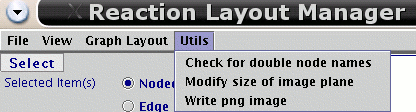
| Settings menu item | Description |
| Check for double node names | Invokes a dialog box with the name of all nodes which occur at least two times in the graph. By clicking on a name the corresponding nodes are highlighted in the graph. |
| Modify size of image plane | Resize the image plane. |
| Write png image | Save the current network graph as png image file. |
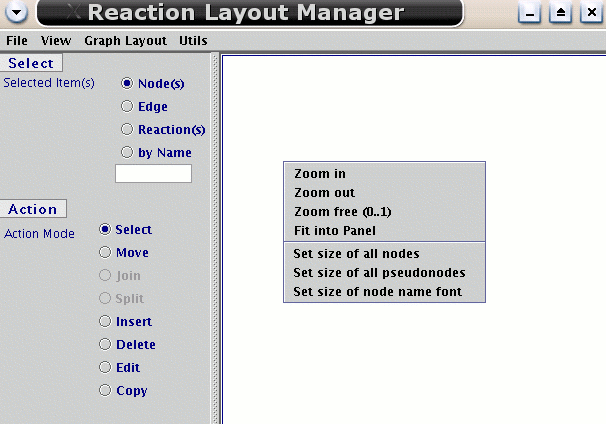
| Settings menu item | Description |
| Zoom in | Zoom into the graph by a predefined zoom factor. |
| Zoom out | Zoom into the graph by a predefined zoom factor. |
| Zoom free | Set your own zoom factor. |
| Fit into panel | Fit the graph into the size of the panel. |
| Set size of all nodes | Set the size of the nodes in the circle representation. |
| Set size of all pseudonodes | Set the diameter of the pseudonodes. |
| Set size of all node name font | Set the font size of compounds in label representation. |

 side:
side: 